Maximize the Speed: Netgear Nighthawk Wi-Fi Router Setup for Fiber Optic Internet
Being on par with the state of our fast-paced, hyperconnected world today calls for a seamless and fast internet connection not only at home but in business as well. Through fiber optic internet, users will be able to experience ultra-high speeds that make downloading large files, streaming high-definition media, and running smart home devices a lot smoother than ever before. However, proper setup will be necessary in order to truly maximize such speeds. Devices like the Netgear Nighthawk Wi-Fi Router, with their reputation for power, speed, and reliability, are ideal candidates to tap into the full potential that a fiber optic connection can offer when properly configured.
It is this step-by-step setup guide that will help you through set up Netgear Nighthawk Wi-Fi Router and get the required network running at maximum performance with an especial emphasis being placed on the use of a Netgear Nighthawk Wi-Fi Extender to further optimize the coverage.
Why choose Netgear Nighthawk for the fiber optic internet connection?
The Netgear Nighthawk series is designed for high-performance, and its ability to handle fast internet makes it a popular choice among the users of fiber optic internet. Actually, the speeds they provide are much faster compared to the traditional DSL or cable connections. So having a router like the Nighthawk will ensure you can tap into that speed.
One feature that makes Netgear Nighthawk routers popular is the higher internet performance they offer:
- Dual or Tri-band features, thus allowing you to distribute the devices efficiently across the frequencies.
- MU-MIMO technology allows several devices to receive data at the same time.
- Beamforming focuses your devices using stronger signals.
- Power processors to handle the high traffic loads well.
How to Step by Step Set Up Netgear Nighthawk Wi-Fi Router for Fiber Optic Internet
1. Unbox and Connect Your Router
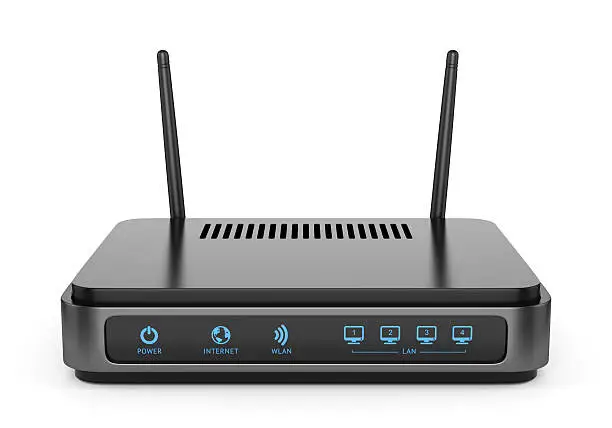
- Unbox your Netgear Nighthawk Wi-Fi Router setup and you will find every component. Now it’s the router, the power adapter, your Ethernet cable, and usually some antennas.
- Take the fiber optic modem, connect it to the router through the Ethernet cable provided. Insert the end of the Ethernet cable to the modem and the other to the WAN or internet port of the router marked in some other color, mostly yellow.
2. Find the Router
- The position you place your router has a big factor on its performance maximization. To attain maximum speed:
- Place the router at the center of your home or office.
- Distant from a thick wall and big metal objects.
- Elevated on a table or shelf, not on the floor.
3. Turning It On
- Connect the power adapter to your Netgear Nighthawk Router and turn it on.
- Wait until they are steady, such as when the power LED and internet LED are stable.
4. Access the Router Interface
- From a computer connected to the router, such as a laptop, open a web browser.
- In the address bar, enter “http://www.routerlogin.net” or “192.168.1.1”.
- You will be prompted to login with the defaults being “admin” and “password” unless these have already been changed. It’s a great point to change these in order to secure things up at this point.
5. Setup Wizard
- Log in and go through Netgear’s Genie Setup Wizard from here.
- The router automatically detects your internet connection type. On most fiber optic installations you will have a
- Dynamic IP address from your ISP. So, click on the appropriate option on the setup page.
- In case your ISP had special settings to provide (like VLAN or PPPoE), fill those as well when asked for.
6. Set up Wi-Fi
- Here you are prompted to set up your Wi-Fi settings. Now you can set your SSID (your Wi-Fi network name) and password.
- Security must employ WPA2 or WPA3 encryption.
- Choose both 2.4GHz and 5GHz bands to get devices compatible with the router
7. Firmware Upgrades
- To ensure that you end up with a high-performance and security protected Wi-Fi router, during installation make sure it checks for the latest firmware upgrades.
8. Router Settings For Maximum Speed
Enable QoS (Quality of Service): This feature lets you prioritize bandwidth for specific devices so your most important gadgets receive the fastest speeds possible.
- Use MU-MIMO: In case of multiple devices, use MU-MIMO (Multi-User, Multiple Input, Multiple Output), which guarantees all connected devices are receiving data efficiently.
- Enable Beamforming: Your Netgear Nighthawk Router will send stronger signals directly toward your devices and not broadcast evenly in all directions with beamforming enabled.
- Channel width: Set channel width depending on how much data your Wi-Fi can handle. Try to set the 5GHz band for 80MHz or 160MHz.
Expanding Wi-Fi coverage with Netgear Nighthawk Wi-Fi extender
If you have a large home or office, or areas where the Wi-Fi signal is weak, a Netgear Nighthawk Wi-Fi Extender can enhance the scope of your network without dropping the pace. The Netgear Nighthawk Wi-Fi Extender setup is easy and built to work in perfect harmony with your existing router.
How to Set Up Netgear Nighthawk Wi-Fi Extender
1. Locate Your Extender
- Place the Wi-Fi extender midway between your router and the area where you want improved coverage. The extender should be in the range of your router’s signal.
2. Connect to the Extender
Switch the extender on and connect to it by using a mobile, notebook, or desktop. At this point, you should look for the name of the extender network- it will often be something like “NETGEAR_EXT.”.
- Now, click to open a web browser and then input “http://www.mywifiext.net in the web address.
- Login with the default passwords. They are below: username: admin password: password
- Continue by following the setup wizard to connect your extender to your Netgear Nighthawk Router .
4. Positioning Optimization
- After establishing your device ensure you move your extender around if necessary to position yourself so that your extender receives a strong signal from your router while still extending your coverage to your dead zones in your home or office.
Troubleshooting Common Issues
1. Slow Speeds
Your internet is slower than it should be. Check:
- Your fiber optic modem is working fine.
- MU-MIMO and QoS are enabled in your router.
- Firmware updates are available.
2. Dropped Wi-Fi Signals
- If the Wi-Fi signal is dropped, either reposition your router and/or extender or switch to a less crowded Wi-Fi channel.
- Use beamforming for stronger and more direct signals to your devices.
3. Devices won’t connect
- If your devices won’t connect to the Wi-Fi network, restart your router and check whether all your security settings such as your password and encryption are set properly
Conclusion
This means you can set up the Netgear Nighthawk Wi-Fi Router with fiber optic internet, ensuring you get the full speed and potential of the connection. Advanced features, such as QoS, beamforming, and MU-MIMO, will ensure you enjoy fast, reliable, and uninterrupted connectivity for all devices. A combination of the router with the setup Netgear Nighthawk Wi-Fi Extender in dead zone areas allows for robust, consistent Wi-Fi coverage over an entire space.
Getting the right setup helps you make complete use of the potential of fiber internet, whether streaming 4K video, online game playing, or just simply appreciating the smoother experience in web browsing.